How to Handle Silkworm Eggs for a Successful Hatch
When you first get into silkworm rearing, the most important step happens before a single caterpillar crawls out. That step is understanding your silkworm eggs. Whether you order them online or get them from a local breeder, the way you store, handle, and incubate those eggs sets the tone for the entire silkworm life cycle. I have lost a few batches early on by rushing this part, and I have seen others do the same. So let me share what I have learned about getting the best hatch rate from your eggs.
Where to Start
First, you need a reliable source. There are many silkworm egg producers out there, but not all of them handle their stock with the same care. I recommend looking for a seller who keeps Bombyx mori in a controlled environment and ships eggs with a bit of moisture regulation. A dry egg is a dead egg, but too much moisture can cause mold. When you receive a silkworm egg shipment, open the package right away and check the eggs. They should look plump and slightly translucent, not shriveled or discolored. If they look like tiny deflated pillows, the shipment likely dried out or got too hot during transit.
Once you have the eggs in hand, the clock starts ticking on silkworm egg viability. Bombyx mori eggs can stay viable for a few weeks if stored correctly, but their fertility drops fast at room temperature. The best approach is to plan your hatch so you have fresh mulberry leaves ready by the time the larvae emerge. If you need to delay the hatch, you can keep the eggs in the refrigerator at around 4 to 6 degrees Celsius for up to two weeks. But do not freeze them, and do not keep them in the fridge for more than a month. Cold storage is a pause button, not a magic preservation trick.
Incubation and Temperature
The key to a strong hatch is maintaining the right silkworm hatching temperature. Bombyx mori eggs need steady warmth to develop. I keep my incubator at 25 to 27 degrees Celsius with a humidity level around 70 percent. If you do not have an incubator, a warm room works as long as the temperature does not swing more than a few degrees. I have used a simple cardboard box with a small heat mat and a thermostat, and it worked fine. Just make sure the eggs are not directly on the heat source, or you will cook them.
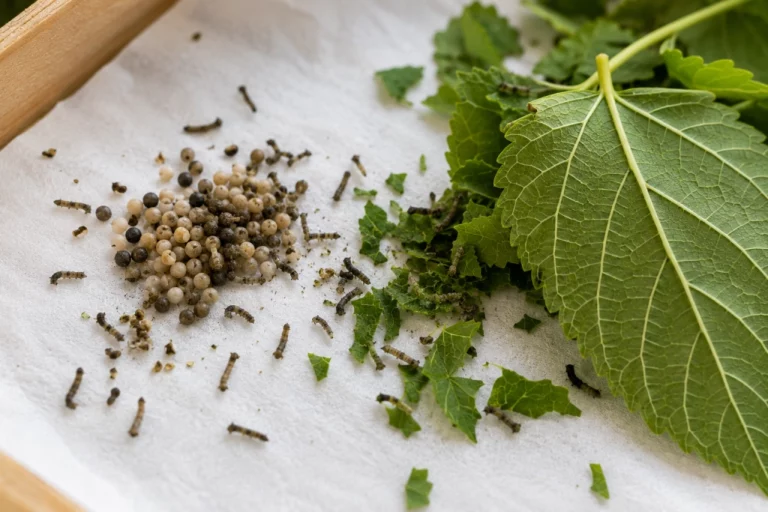
Silkworm egg incubation takes about 10 to 14 days at that temperature. During this time, the eggs will change color. Fresh eggs are light yellow, then they turn darker gray or black as the embryo develops. That color change is a good sign that the eggs are healthy. If they stay light yellow for more than two weeks, something is off. Either the temperature is too low, or the eggs were not fertile to begin with.
Preparing for Hatch Day
While you wait, get your silkworm food ready. For Bombyx mori, that means fresh mulberry leaves. There is no substitute for the real thing. I have tried artificial diets, and while they work in a pinch, the larvae grow slower and produce weaker silk. If you do not have a mulberry tree nearby, you can buy leaves online or grow a small mulberry bush indoors. Just make sure the leaves are pesticide-free. Even a trace of insecticide can wipe out an entire brood.
A few days before the eggs are due to hatch, set up your rearing container. I use a plastic tub with a mesh lid for ventilation. Line the bottom with a layer of paper towel or a thin cloth. This is your silkworm bedding. It keeps the container clean and absorbs excess moisture. Do not use newspaper, the ink can be toxic to the tiny larvae. When the eggs start to hatch, you will see tiny black specks moving around. Those are the first instar larvae. They are so small that you might mistake them for dust at first.
First Feed and Care
The moment the larvae hatch, they need food. Place a few tender mulberry leaves on top of the eggs. The larvae will climb onto the leaves and start eating. Do not move them manually, they are too fragile. Just put the leaves on top of the eggs and let the larvae find their own way. This is also when you begin silkworm egg care in earnest. Keep the temperature steady and the leaves fresh. Replace the leaves every day, and remove any old, dried leaves to prevent mold.
One mistake beginners make is overcrowding. A single batch of silkworm eggs can yield hundreds of larvae. If you put them all in one small container, they will compete for food and space, and the silkworm survival rate will drop. I split my hatch into two or three containers once they are a few days old. It gives each larva room to grow and makes it easier to keep the bedding clean.
Growth Stages and Challenges
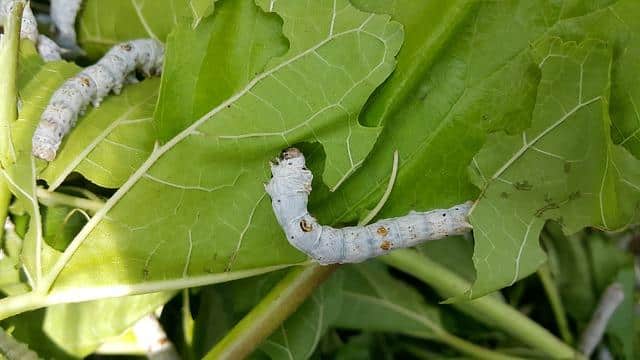
Silkworm growth stages are predictable. They molt four times over about four weeks, and each molt marks a new instar. During the first two instars, the larvae are delicate and prone to disease if conditions are too damp or dirty. Silkworm diseases like flacherie and grasserie can spread fast in a crowded, humid container. The best defense is cleanliness. Remove frass (droppings) every day, keep the bedding dry, and do not let old leaves rot. If you see a larva that looks limp or discolored, isolate it right away.
By the fifth instar, the larvae will be fat, about the size of your little finger, and they will eat constantly. This is the most labor-intensive phase. They can strip a whole tray of mulberry leaves in a few hours. I usually stock up on leaves a week ahead and store them in the fridge to keep them fresh. When the larvae stop eating and start wandering, they are ready to spin cocoons. That is when you provide a structure for them to climb, like a cardboard egg carton or a bundle of twigs. Within a few days, they will form silkworm cocoons.
From Cocoons to Moths
After about two weeks inside the cocoon, the pupa transforms into an adult moth. Silkworm moths emerge by secreting a fluid that softens the cocoon. They cannot fly, and they do not eat. Their only job is to mate and lay eggs. The female lays several hundred eggs over a few days. If you want to continue the cycle, collect those eggs and store them properly. If you do not, the eggs will dry out and die within a week.
This is where silkworm eggs storage becomes important again. Once the eggs are laid, let them sit at room temperature for a day or two so they can harden. Then move them to a cool place if you want to delay the next hatch. I keep mine in a sealed container with a slightly damp cotton ball to maintain humidity. Check them every few days for mold. If you see any fuzzy growth, remove the affected eggs immediately.
Practical Advice for Beginners
If you are new to silkworm breeding, start small. Order a batch of 50 to 100 silkworm eggs from a reputable producer. That gives you enough to learn without being overwhelmed. Keep a notebook with the hatch date, temperature, and any problems you see. Over time, you will notice patterns that help you fine-tune your setup. For example, I learned that my room is too dry in winter, so I add a small humidifier near the container during incubation. Small adjustments like that can double your hatch rate.
One more thing about silkworm egg viability. Not all eggs will hatch, even under perfect conditions. A 70 to 80 percent hatch rate is normal for good stock. If you get less than that, the problem is usually either temperature swings during incubation or poor handling during shipment. Do not blame yourself right away. Try a different supplier next time, and compare the results.
Silkworm rearing is a rewarding hobby, but it requires attention to detail from the very start. The eggs are the foundation of everything that follows. Treat them with care, and you will have a healthy, productive colony. Ignore the basics, and you will end up with a lot of empty egg shells and frustration. I hope this guide helps you get off to a strong start.